Logging In
To log in, scroll down to the bottom of the page and click on the © copyright symbol in the footer.To edit a page
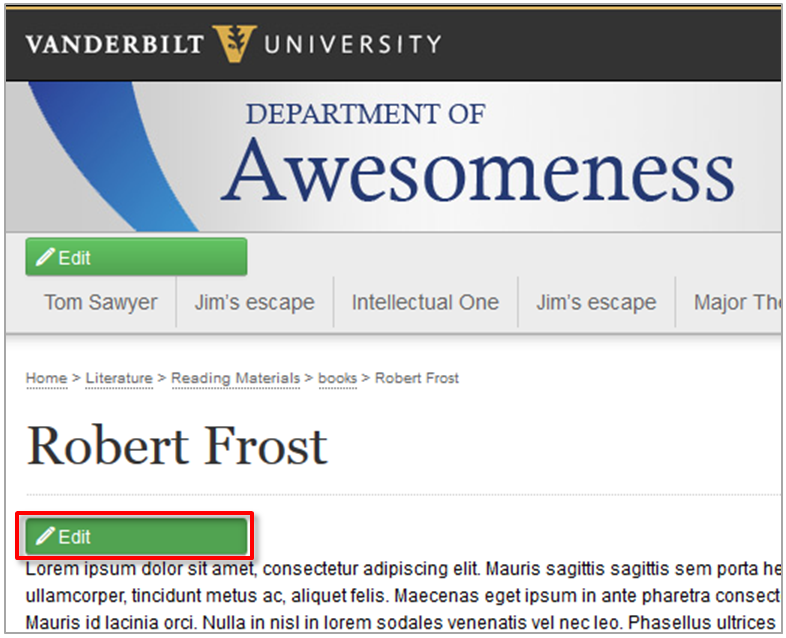
Once you have logged in you will be taken to the “Edit” mode. Click on the green edit button for the region you want to edit.
Screencast Tutorial
”no video embed”Step by Step Tutorial
Editing is a breeze with OmniUpdate. You don’t have to know any web coding and you don’t need any special software. All you need is a web browser and live Internet connection – and you’re ready to roll. You can edit your pages at 2 a.m. in Tahiti – Omni doesn’t care about the time of day or the location.
Explore the links below to learn more about basic editing with Omni.
Basic Editing
Open your browser (Firefox, Chrome, or another browser. We do not recommend using Internet Explorer) and navigate to the page of your Omni website that you’d like to edit.
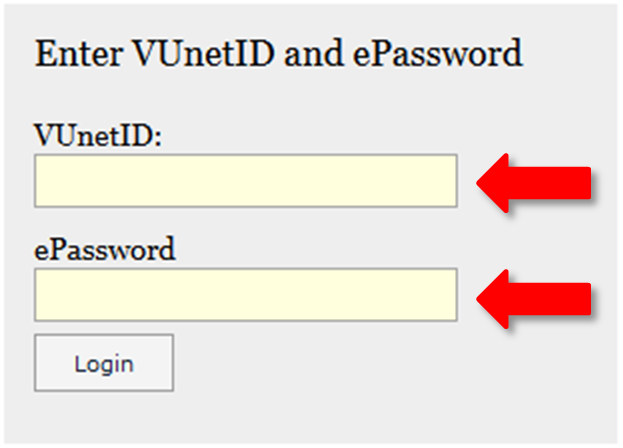
2. Scroll to the bottom of the page and click on the copyright symbol.


3. Log in with your Omni user name (VUnetID) and password and click login.
4. Click on the green edit button for the region of the page that you’d like to edit.
5. Edit your content or create new content and style it with the toolbar controls. You will find that these controls are very similar to Microsoft Word. When you’ve finished making your changes, click on the Save icon in the toolbar.

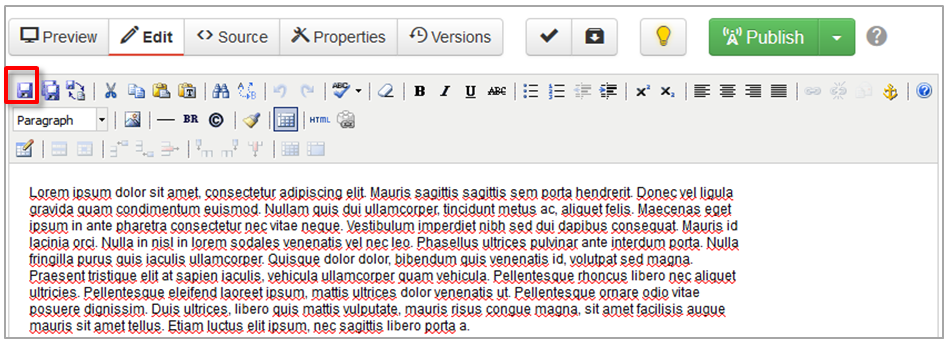
6. Your page is now saved on the Omni staging server. It won’t be live for the world to see until you click the green Publish button.
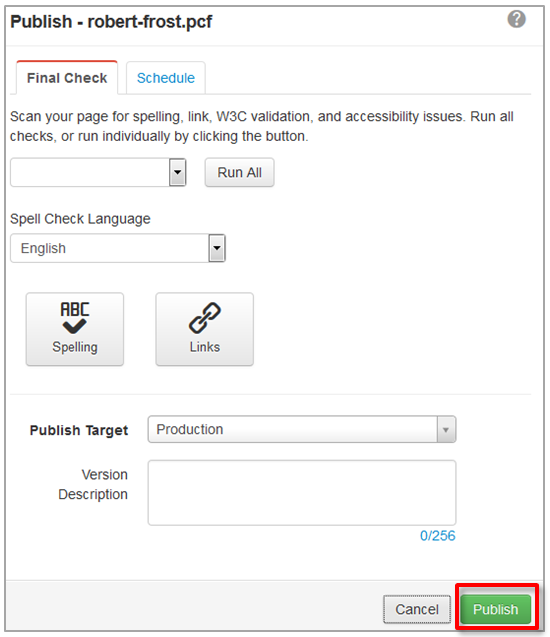
7. A dialog box will appear. Here you can click the buttons for Link, to check the links on your page, and Spelling to spell check your page. Add a version note to the Version Description field if you wish to document your changes for later reference. If you’re ready to publish your page to the live server, click on the green Publish button. Note that it can take a few minutes for Vanderbilt’s server to go live with your changes.


8. Click Publish again at the prompt.
9. A message will appear at the bottom of the page letting you know that your page has been published. Click on “View in new window” to see published page.


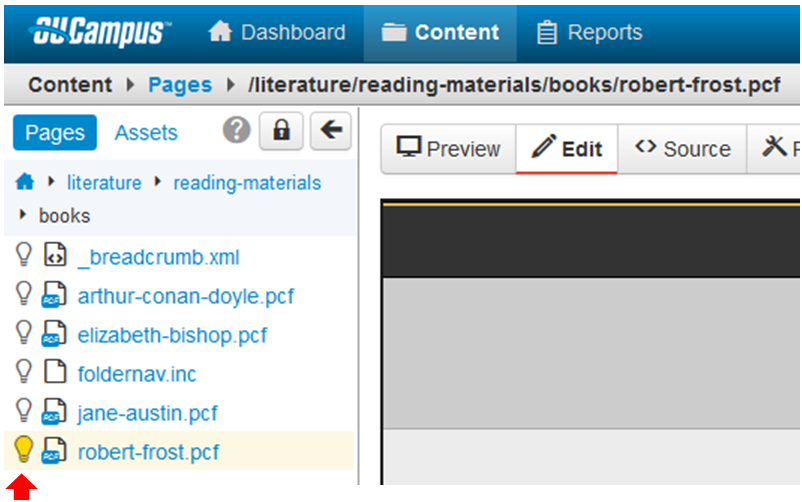
10. If you’d like to make edits on another page, go back to your Omni page in your browser where you were editing before. Look in the left pane of the dialog box and you’ll see a list of files. If the left pane isn’t visible, click on the folder icon to view it. Once opened you can toggle it closed again by clicking on the arrow icon.


Locate the file that you’d like to edit, and then click on the lightbulb icon for that file. The lightbulb icon will turn yellow, meaning that you’ve checked out the file. Then click on the link for the file name and that file will open in Omni’s edit mode.